This post contains affiliate links.
Welcome to the ultimate guide for revamping your kitchen cabinets! The kitchen is the heart of the home, and updating your cabinets can have a significant impact on the overall aesthetic and functionality of the space. You don’t need to spend a fortune on replacing them; painting your cabinets can give them a fresh, new look at a fraction of the cost.
In this article, we’ll explore the benefits of painting your kitchen cabinets and share the top 5 cabinet painting hacks to make the process smooth and efficient. With these tips and tricks, you’ll be able to transform your kitchen into a space you’ll love spending time in. So, let’s dive in and start giving your kitchen the makeover it deserves!
Preparing Your Cabinets for Painting
Before we jump into the top cabinet painting hacks, it’s crucial to understand the importance of properly preparing your cabinets for the painting process. In this section, we’ll walk you through the essential steps to ensure your cabinets are ready to receive a fresh coat of paint, resulting in a professional-looking and long-lasting finish. Let’s get started on setting the foundation for your cabinet transformation!
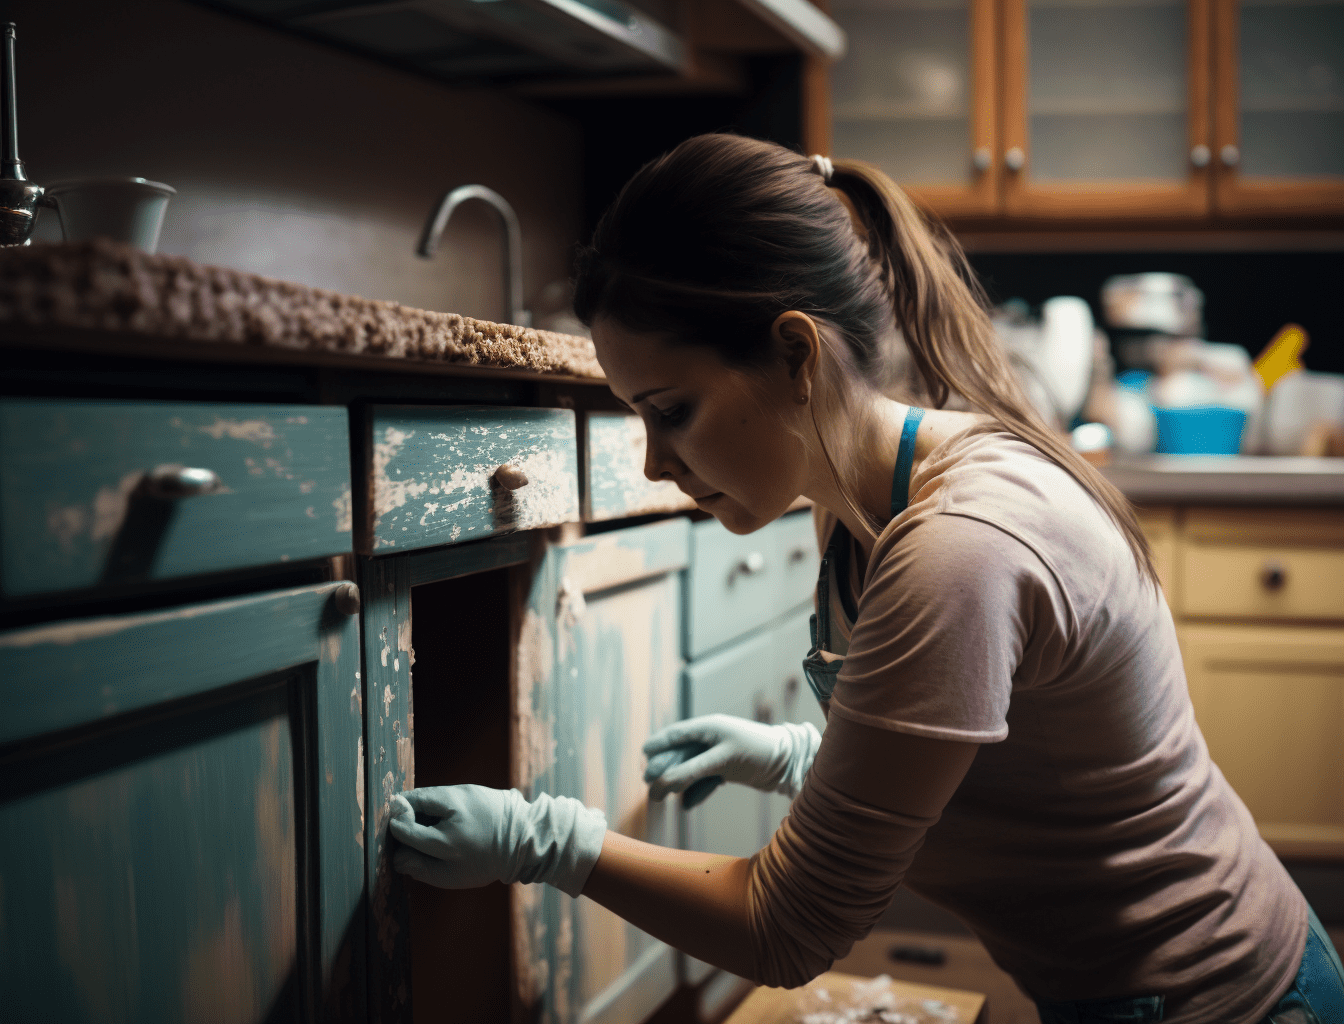
A. Cleaning and Degreasing
A clean and grease-free surface is essential for the paint to adhere correctly and create a lasting finish on your kitchen cabinets. Over time, cabinets accumulate dirt, grime, and grease, which can affect the paint’s bond to the surface. Follow these steps to ensure your cabinets are squeaky clean and ready for painting:
1. Gather your cleaning supplies
- A mild detergent or degreaser
- Warm water
- Microfiber cloths or non-abrasive sponges
- Bucket or large container
- Rubber gloves
2. Mix your cleaning solution
Combine the mild detergent or degreaser with warm water in a bucket or large container, following the manufacturer’s instructions for dilution. Make sure to wear rubber gloves to protect your hands during the cleaning process.
3. Start cleaning
- Dip a microfiber cloth or non-abrasive sponge into the cleaning solution and wring it out to remove any excess water.
- Gently scrub the cabinet surfaces, paying extra attention to areas with visible grease or grime.
- Rinse the cloth or sponge frequently in the cleaning solution to remove dirt and continue cleaning until all surfaces are free of grease and grime.
4. Rinse and dry
Once your cabinets are clean, use a clean cloth or sponge dipped in plain water to rinse off any remaining cleaning solution residue. Be sure to wring out the cloth or sponge thoroughly to avoid saturating the cabinet surfaces. After rinsing, use a clean, dry microfiber cloth to dry the cabinets completely.
By taking the time to clean and degrease your kitchen cabinets, you’ll create an ideal surface for the primer and paint to adhere to, resulting in a professional and long-lasting finish.
B. Removing Hardware
Next, you’ll need to remove all the hardware from your kitchen cabinets before painting. This step ensures that your paint job looks clean and professional, without any drips or brush marks around hinges, knobs, and pulls. Follow these steps to remove your cabinet hardware with ease:
1. Gather your tools
- Screwdriver or drill with appropriate bits
- Ziplock bags or containers
- Permanent marker
- Painter’s tape (optional)
2. Remove cabinet doors and drawer fronts
- Carefully unscrew the hinges from the cabinet doors, and set the doors aside.
- Similarly, remove drawer fronts from their bases by detaching any screws or fasteners.
3. Remove knobs, pulls, and other hardware
- Unscrew the knobs or pulls from the doors and drawer fronts.
- Detach any remaining hardware, such as catches or magnetic closures.
4. Organize and label hardware
- Place each set of hardware in a separate Ziplock bag or container to keep everything organized.
- Label the bags or containers with a permanent marker, indicating the location of each set of hardware (e.g., “Upper Left Cabinet” or “Drawer #3”).
- Optionally, you can use painter’s tape to label the cabinet doors and drawer fronts themselves, corresponding to the labeled hardware.
With the hardware removed, you have a great opportunity to upgrade your kitchen’s look even further by choosing new knobs, pulls, and other hardware to complement your freshly painted cabinets. For ideas and inspiration, check out our related blog post on “Choosing Cabinet Hardware for Rustic Kitchens. This article discusses various hardware options that can help you decide on the perfect new hardware to complete your cabinet transformation.
By carefully removing and organizing your cabinet hardware, you’ll ensure a smooth and professional-looking paint job while making it easy to reassemble your kitchen cabinets once the painting is complete.
C. Sanding the Surface
Sanding the surfaces of your kitchen cabinets is a crucial step in the preparation process, as it helps create a smooth surface for the primer and paint to adhere to. Proper sanding also helps remove any imperfections and ensures a professional, even finish. Follow these guidelines for effective sanding:
1. Choose the right sandpaper grit
- Start with medium-grit sandpaper (around 120-grit) to remove the old finish and smooth out any rough areas.
- Finish with a fine-grit sandpaper (around 220-grit) for a smooth surface that’s ready for priming.
2. Gather your sanding tools
- Sandpaper sheets in medium and fine grit
- Sanding block or sponge (optional but recommended for even pressure)
- Vacuum or microfiber cloth for cleaning up dust
3. Sand the cabinet surfaces
- Fold a sheet of medium-grit sandpaper around a sanding block or sponge, or use it by itself.
- Apply even pressure while sanding the cabinet surfaces, following the wood grain to avoid scratches.
- Be sure to sand edges, corners, and any decorative details on the cabinet doors and drawer fronts.
4. Switch to fine-grit sandpaper
- Once the surfaces are smooth and the old finish is removed, switch to fine-grit sandpaper.
- Lightly sand the surfaces again to achieve a silky-smooth texture that’s perfect for painting.
5. Clean up the dust
- After sanding, use a vacuum with a brush attachment or a microfiber cloth to remove any dust from the cabinet surfaces.
- Make sure to thoroughly clean all crevices and corners, as dust left behind can interfere with paint adhesion.
By diligently sanding your kitchen cabinet surfaces, you’ll create an ideal base for primer and paint, resulting in a smooth, even, and professional-looking finish.
D. Repairing Any Damage
Before you begin painting, it’s essential to address any damage, such as dents, scratches, or loose joints, on your kitchen cabinets. Repairing these issues ensures a flawless finish and increases the longevity of your cabinets. Here’s how to fix common types of cabinet damage:
1. Repairing dents and scratches
- Clean the damaged area thoroughly to remove any dirt or debris.
- Fill any dents or deep scratches with wood filler, following the manufacturer’s instructions.
- Allow the wood filler to dry, then sand the filled area with fine-grit sandpaper until it’s smooth and level with the surrounding surface.
2. Fixing loose joints
- Identify any loose or wobbly joints on your cabinet doors or drawer fronts.
- Carefully disassemble the joint, applying wood glue to the mating surfaces, and reassemble the joint.
- Use clamps to hold the joint securely in place while the glue dries, following the manufacturer’s recommended drying time.
3. Replacing damaged wood
- If you have severely damaged wood that cannot be repaired with filler or glue, you may need to replace the affected part.
- Carefully remove the damaged section and use it as a template to cut a new piece of wood to the same size and shape.
- Attach the new wood piece using wood glue or screws, ensuring a secure and even fit.
4. Addressing peeling veneer
- If your cabinets have a veneer surface that is peeling or chipped, carefully remove any loose veneer with a putty knife.
- Apply wood glue beneath the lifted veneer and press it firmly back into place.
- Use painter’s tape or clamps to hold the veneer in position while the glue dries.
Taking the time to repair any damage on your kitchen cabinets will not only improve their appearance but also ensure a durable and long-lasting finish. With your cabinets in top condition, you’re now ready to move on to the next step: choosing the right paint and primer for your project.
Choosing the Right Paint and Primer
Now that your cabinets are clean, sanded, and damage-free, it’s time to select the appropriate paint and primer for your project. The right products will not only provide a beautiful finish but also ensure durability and longevity for your kitchen cabinets. In this section, we’ll guide you through the process of choosing the best paint and primer for your cabinets, considering factors such as surface type, color, and desired finish.
A. Types of Paint Suitable for Cabinets
When it comes to painting kitchen cabinets, not all paint types are created equal. You’ll want to choose a paint that offers excellent adhesion, durability, and a smooth finish. Here are the most suitable types of paint for cabinets:
1. Acrylic latex paint
- Water-based and easy to clean up with soap and water
- Quick-drying and offers excellent adhesion to various surfaces
- Resistant to chipping and peeling
2. Alkyd paint
- Oil-based paint that dries to a hard, durable finish
- Provides excellent coverage and a smooth, professional appearance
- Requires mineral spirits for cleanup and longer drying time
3. Chalk paint
- Provides a matte, chalky finish that’s popular for vintage or farmhouse-style kitchens
- Adheres well to various surfaces without the need for extensive surface preparation
- Can be sealed with wax or a clear coat for added durability
Before purchasing your paint, consider the type of finish you want to achieve and the level of durability you require. High-quality paint products, such as Benjamin Moore Advance (acrylic latex) and Sherwin-Williams ProClassic (alkyd), are highly recommended for kitchen cabinets due to their excellent performance and long-lasting results.
When selecting the paint for your cabinets, keep in mind that lighter colors tend to show dirt and stains more easily, while darker colors can hide imperfections better. It’s essential to choose a color that not only complements your kitchen’s design but also meets your maintenance preferences.
B. Primer Selection and Application
Choosing the right primer is just as important as selecting the right paint for your kitchen cabinets. Primer ensures proper adhesion, helps hide imperfections, and provides a solid base for the paint. Here’s what you need to know about primer selection and application:
1. Types of primers
- Oil-based primers: Offer excellent adhesion and stain-blocking properties, but require mineral spirits for cleanup and have a longer drying time.
- Water-based primers: Easy to clean up with soap and water, quick-drying, and suitable for most surfaces. However, they may not block stains as effectively as oil-based primers.
2. Choosing the right primer
- Match the primer to your chosen paint type (e.g., use a water-based primer with acrylic latex paint).
- Consider stain-blocking primers if your cabinets have significant stains or discoloration that need to be covered.
- Look for high-quality products, such as Zinsser Bulls Eye 1-2-3 Primer (water-based) or KILZ Original Multi-Surface Stain-Blocking Primer (oil-based), for optimal results.
3. Primer application tips
- Ensure that your cabinets are clean, dry, and free of dust before applying primer.
- Use a high-quality brush or foam roller for smooth, even coverage.
- Apply a thin coat of primer, allowing it to dry according to the manufacturer’s instructions before applying additional coats if needed.
- Lightly sand the primer with fine-grit sandpaper (around 220-grit) once it’s dry, then clean up any dust with a tack cloth or vacuum.
By choosing the appropriate primer and applying it correctly, you’ll create a strong foundation for your paint, ensuring a durable and long-lasting finish for your kitchen cabinets.
C. Color Choice and Trends
Selecting the right color for your kitchen cabinets can have a significant impact on the overall look and feel of your space. Your choice should not only reflect your personal taste but also consider current trends and the design of your kitchen. Here are some tips and popular color trends for painting kitchen cabinets:
1. Coordinate with existing elements
- Consider the color of your countertops, backsplash, walls, and appliances when choosing a cabinet color.
- For a cohesive look, choose a color that complements and enhances the other elements in your kitchen.
2. Consider the size and lighting of your kitchen
- Lighter colors can make a small or dimly lit kitchen feel more spacious and brighter.
- Darker colors can add depth and sophistication to a larger, well-lit kitchen.
3. Popular color trends
- Neutral colors: White, gray, and beige are timeless choices that work well in most kitchens and can easily adapt to changing trends.
- Bold colors: Navy blue, emerald green, and deep red can make a strong statement and add personality to your kitchen. These colors work best as accents or on island cabinets to avoid overwhelming the space.
- Two-tone cabinets: Combining two different colors, such as white upper cabinets with a darker color for the lower cabinets, can create a dynamic and visually interesting look.
4. Test before committing
- Purchase small samples of your top color choices and paint swatches on a spare cabinet door or a piece of cardboard.
- Observe how the colors look in your kitchen under different lighting conditions and at various times of day before making a final decision.
Taking the time to carefully consider your color choice and staying informed of current trends will help you select a cabinet color that not only enhances your kitchen’s appearance but also adds value and appeal to your home.
Top 5 Cabinet Painting Hacks
With the right paint, primer, and color chosen, it’s time to learn some valuable tips and tricks to make your cabinet painting project a breeze. In this section, we’ll share our top 5 cabinet painting hacks that will help you achieve professional-quality results with minimal effort. These tried-and-tested techniques will save you time, money, and frustration, ensuring a successful and satisfying kitchen makeover.
Hack #1: Using a Paint Sprayer for a Smooth Finish
One of the best ways to achieve a smooth, professional finish on your painted cabinets is by using a paint sprayer instead of traditional brushes or rollers. Paint sprayers offer several advantages over other painting methods:
- Even application with no brush or roller marks
- Faster painting process, especially for large surfaces or multiple cabinet doors
- Ability to reach tight spaces and corners with ease
To get started, you’ll need a suitable paint sprayer for your project. There are various options available on the market, but for DIY cabinet painting, an HVLP (high-volume, low-pressure) paint sprayer is recommended due to its easy-to-use design and precise control. A popular choice among homeowners is the HomeRight Finish Max HVLP Paint Sprayer, which offers an adjustable spray pattern and flow control for optimal results.
When using a paint sprayer, keep these tips in mind:
- Practice spraying on a piece of cardboard or scrap wood before starting on your cabinets to get comfortable with the technique and settings.
- Apply multiple thin coats of paint, allowing each coat to dry according to the manufacturer’s instructions before applying the next.
- Wear proper safety gear, such as a respirator mask and safety goggles, to protect yourself from paint fumes and overspray.
By investing in a quality paint sprayer and following these tips, you’ll achieve a smooth, professional finish on your kitchen cabinets that rivals the work of an expert.
Hack #2: Labeling Doors and Hardware for Easy Reassembly
Keeping track of your cabinet doors and hardware during the painting process can be a daunting task, especially if you have many cabinets to work with. To make reassembly a breeze, use a simple labeling system for your doors and hardware:
- Before removing your cabinet doors and hardware, assign a number or letter to each cabinet door and its corresponding location on the cabinet frame.
- Write the assigned label on a piece of painter’s tape and stick it to the back of each door and inside the cabinet frame.
- As you remove the hardware (hinges and pulls), place them in individual plastic bags labeled with the corresponding door number or letter.
By organizing and labeling your cabinet doors and hardware, you’ll avoid confusion and save time during the reassembly process. This simple hack will ensure that each piece finds its way back to its original location, making your kitchen look as good as new after your painting project is complete.
Hack #3: Using Painter’s Tape for Clean Edges
For a polished and professional look, it’s essential to create clean, sharp edges when painting your kitchen cabinets. One of the easiest ways to achieve this is by using painter’s tape to mask off areas where you want to prevent paint from bleeding onto adjacent surfaces. Follow these steps for a successful tape application:
- Start by purchasing high-quality painter’s tape, such as FrogTape Multi-Surface Painter’s Tape, which is designed to create sharp, clean lines and can be easily removed without damaging surfaces.
- Before applying the tape, ensure the surfaces are clean, dry, and free of dust or debris. This will help the tape adhere properly and prevent paint from seeping underneath.
- Apply the tape along the edges where you want a clean line, such as where the cabinet frame meets the wall or countertop. Press the tape firmly to create a tight seal, smoothing out any wrinkles or bubbles as you go.
- Once the tape is in place, paint the cabinets as desired, being careful not to apply too much paint near the taped edges, which can cause the paint to bleed underneath.
- After the final coat of paint has dried, carefully remove the painter’s tape by pulling it back on itself at a 45-degree angle. If any paint seeped under the tape, use a sharp utility knife to gently score the edge before removing the tape.
By using painter’s tape to create clean edges, your painted cabinets will have a professional, crisp appearance that adds a touch of sophistication to your kitchen makeover.
Hack #4: Adding a Protective Top Coat for Durability
To ensure your freshly painted cabinets look great and last for years to come, applying a protective top coat is crucial. A durable top coat not only enhances the appearance of your cabinets but also provides added protection against wear and tear, moisture, and daily kitchen activities. Here’s how to select and apply the right top coat for your cabinets:
- Choose the right product: Look for a water-based polyurethane or polycrylic top coat that is designed for use on cabinets and provides a durable, scratch-resistant finish. A popular choice among DIYers is Minwax Polycrylic Protective Finish, which is available in various sheens to suit your desired look.
- Preparation: Before applying the top coat, ensure that your painted cabinets are completely dry and free of dust or debris. Lightly sand the surface with fine-grit sandpaper (220 grit or higher) to remove any imperfections and promote adhesion.
- Application: Apply the top coat using a high-quality synthetic brush or foam brush, working in thin, even coats. Be sure to follow the manufacturer’s instructions regarding drying times between coats. Typically, two to three coats are recommended for optimal protection.
- Sanding between coats: Lightly sand the surface between each coat using fine-grit sandpaper to ensure a smooth, even finish. Be sure to remove any dust or debris before applying the next coat.
- Drying and curing: Allow the final coat to dry completely, and follow the manufacturer’s recommendations for curing time before reinstalling your cabinet doors and hardware.
By adding a protective top coat to your painted cabinets, you’ll ensure they stay looking new and beautiful for years to come, while also protecting your investment and hard work.
Hack #5: Adding Creative Details (Stencils, Patterns, Etc.)
Adding creative details to your painted cabinets can elevate their appearance and give your kitchen a personalized touch. Stencils, patterns, and other decorative techniques can add visual interest and transform ordinary cabinets into a unique design feature. Here are some ideas for adding creative details to your cabinets:
- Stencils: Use stencils to create intricate designs or patterns on your cabinet doors or drawers. There are many stencil options available, such as the GSS Designs Kitchen Cabinet Stencil, which offers a variety of patterns to choose from. Simply place the stencil over the desired area, secure it with painter’s tape, and paint over the stencil using a small brush or roller.
- Two-tone or color-blocking: Experiment with two-tone cabinets by painting upper and lower cabinets in different colors or using contrasting shades on cabinet doors and frames. This can create a striking, modern look and add depth to your kitchen design.
- Distressed or antiqued finish: Give your cabinets a rustic or vintage feel by applying a distressed or antiqued finish. This can be achieved by lightly sanding the edges of your painted cabinets to expose the underlying wood or using a glaze to create a worn, aged appearance.
- Decorative hardware: Swap out your existing hardware for more decorative or unique pieces to complement your painted cabinets. Refer to the related blog post, “Choosing Cabinet Hardware for Rustic Kitchens“, for ideas on selecting the perfect hardware for your style.
By incorporating creative details into your cabinet painting project, you’ll not only update your kitchen’s appearance but also create a space that reflects your personal style and taste.
Essential Tools and Supplies for Painting Cabinets
Before diving into your cabinet painting project, it’s crucial to gather all the essential tools and supplies needed for a successful outcome. Having the right equipment on hand will not only make the process more efficient but also help you achieve professional-looking results. In this section, we’ll cover the must-have items for your cabinet painting journey and provide some recommendations for selecting the best products.
A. Paint Sprayers
Paint sprayers are a game-changer when it comes to painting cabinets, providing a smooth, even finish without the brush or roller marks that can detract from the final appearance. Here’s what to consider when choosing a paint sprayer for your cabinet painting project:
- Types of paint sprayers: There are three main types of paint sprayers: airless, compressed air, and HVLP (high-volume, low-pressure). For painting cabinets, HVLP sprayers are generally the best choice, as they provide a high level of control and produce less overspray compared to airless or compressed air sprayers.
- Features to look for: When selecting a paint sprayer, consider factors such as adjustable pressure, spray patterns, and easy cleaning. Additionally, opt for a sprayer with a sufficient paint capacity to minimize refilling during the painting process.
- Recommended paint sprayers: A popular HVLP paint sprayer for DIY cabinet painting projects is the HomeRight Finish Max Paint Sprayer, which offers an adjustable spray control, easy cleaning, and a compact design. Another well-regarded option is the Wagner Spraytech Control Spray Double Duty HVLP Paint Sprayer, which boasts a two-stage indoor/outdoor rated air turbine for a continuous flow of material and air, producing a professional fine finish.
Investing in a quality paint sprayer will not only make your cabinet painting project more manageable but also help you achieve a smooth, professional-looking finish that you can be proud of.
B. Brushes and Rollers
Even if you’re using a paint sprayer, it’s still essential to have quality brushes and rollers on hand for touch-ups, detail work, or reaching areas where a sprayer might not be practical. Here’s what to consider when selecting brushes and rollers for your cabinet painting project:
- Brush types: Choose brushes with synthetic bristles, such as nylon or polyester, which work well with water-based paints commonly used for cabinets. Opt for angled sash brushes for cutting in and flat brushes for larger surfaces. The Wooster Brush Q3211-2 Shortcut Angle Sash Paintbrush is an excellent choice for its comfortable handle and precise control.
- Roller types: Foam rollers are ideal for painting cabinets, as they produce a smooth, even finish with minimal stippling. Look for high-density foam rollers designed specifically for smooth surfaces, like the Bates Paint Roller, which includes a roller frame, two roller covers, and a paint tray.
- Quality matters: Investing in high-quality brushes and rollers will not only make your painting process more efficient but also result in a better finish. Cheap brushes and rollers can shed bristles or fibers, leaving imperfections on your painted cabinets.
Having the right brushes and rollers on hand is crucial for achieving professional-looking results when painting your cabinets. By selecting high-quality tools, you’ll ensure a smooth, even finish and make the painting process more enjoyable.
C. Painter’s Tape
Painter’s tape is an essential tool for achieving clean, crisp edges when painting cabinets, and it helps protect surfaces that should remain paint-free. Here’s what to consider when selecting painter’s tape for your cabinet painting project:
- Tape width: Painter’s tape comes in various widths, ranging from 0.94 inches to 3 inches. Choose a width that suits your project – wider tape provides more surface protection but may be harder to work with in tight spaces. A 1.5-inch wide tape is a versatile choice for most cabinet painting projects.
- Adhesion level: Select a painter’s tape with a medium to low adhesion level, which will stick well enough to create a tight seal but can be removed easily without damaging the surface. Avoid using masking tape, as it can leave residue or peel off the finish.
- Recommended painter’s tape: ScotchBlue Original Multi-Surface Painter’s Tape is a popular choice among DIYers and professionals alike, thanks to its 14-day clean removal, UV resistance, and ability to create sharp paint lines. Another excellent option is FrogTape Multi-Surface Painter’s Tape, which features PaintBlock technology that reacts with water in latex paint to form a micro-barrier, preventing paint bleed and ensuring clean lines.
Investing in a high-quality painter’s tape is crucial for achieving professional-looking results when painting your cabinets. By selecting the right tape for your project, you’ll ensure clean, crisp edges and protect your surfaces from unwanted paint.
D. Sandpaper and Sanding Blocks
Sanding is a vital step in preparing your cabinets for painting, and using the right sandpaper and sanding tools will make the process easier and more effective. Here’s what to consider when selecting sandpaper and sanding blocks for your cabinet painting project:
- Grits: Sandpaper grits range from coarse (40-60 grit) to fine (150-180 grit). Start with a medium grit (80-120) to remove the old finish and smooth out any imperfections, then use a fine grit (150-180) for the final sanding before painting. A sandpaper assortment pack, like the 3M 9005NA Assorted Grit Aluminum Oxide Sandpaper, is a convenient option.
- Sanding blocks: Using a sanding block will help you maintain even pressure and make sanding easier on your hands. Opt for a comfortable, easy-to-grip sanding block like the 3M Sanding Sponge or the Warner Sanding Block Hand Sander. These blocks can be used with standard sandpaper sheets or pre-cut sanding sheets designed for the block.
- Detail sanders: For intricate areas and tight corners, a detail sander can be a valuable tool. The BLACK+DECKER Mouse Detail Sander is a popular choice for its compact size and easy-to-change sanding pads. Be sure to use a light touch to avoid removing too much material.
Having the right sandpaper and sanding tools is crucial for achieving a smooth, even surface when painting your cabinets. By selecting the appropriate grits and tools for your project, you’ll make the sanding process more efficient and effective, resulting in a professional-looking finish.
Incorporating Additional Kitchen Design Elements
Once you’ve successfully painted your kitchen cabinets, you may find yourself inspired to further enhance your kitchen’s design. In this section, we’ll explore additional design elements that can complement your freshly painted cabinets and create a cohesive, stylish kitchen. From lighting to hardware, these upgrades can help elevate your kitchen’s overall appearance and functionality.
A. Updating Countertops
Updating your countertops can make a significant impact on the overall look of your kitchen, and there are plenty of materials to choose from. Here are a few things to consider when selecting new countertops to complement your freshly painted cabinets:
- Material: Countertop materials range from natural stones like granite and marble to engineered materials like quartz and laminate. Each material has its own set of pros and cons, so it’s essential to research your options before making a decision. Check out our related blog post on “Natural Stone vs. Engineered Flooring Materials: Pros and Cons for more information on the benefits and drawbacks of various countertop materials.
- Color and Pattern: The right countertop color and pattern can either enhance or detract from your painted cabinets. Consider the cabinet color, your kitchen’s overall design, and your personal preferences when selecting a countertop color. In general, it’s best to choose a countertop that contrasts or complements the cabinet color.
- Budget: Countertop materials can vary significantly in price, so it’s crucial to set a budget before making a decision. While natural stone countertops tend to be more expensive, laminate and other engineered materials can offer a more budget-friendly option without sacrificing style.
- Installation: Replacing countertops can be a complex process, so it’s essential to hire a professional to ensure proper installation. Make sure to get several quotes and check references before committing to a contractor.
Updating your countertops is an excellent way to elevate your kitchen’s appearance and functionality. By considering the factors mentioned above and referring to our related blog post, you’ll be better equipped to choose the perfect countertops to match your newly painted cabinets.
B. Lighting
Proper lighting is essential for creating a functional and inviting kitchen space. By carefully selecting and positioning lighting fixtures, you can enhance the appearance of your freshly painted cabinets and improve the overall ambiance of your kitchen. Here are some tips for updating your kitchen lighting:
- Layered Lighting: Implementing a layered lighting approach can help create a balanced and versatile kitchen space. This strategy involves using a combination of ambient, task, and accent lighting to address various needs and activities in the kitchen. Our related blog post on “Smart Lighting Solutions to Enhance Your Cooking and Dining Experience provides more information on layering different types of lighting.
- Under-Cabinet Lighting: Installing under-cabinet lighting can illuminate your countertops and showcase your painted cabinets. LED strip lights or puck lights are popular options for under-cabinet lighting, as they provide bright, focused light without taking up much space.
- Pendant Lighting: Pendant lights can add both style and functionality to your kitchen. Use them above your kitchen island or dining table to create a focal point and provide task lighting for cooking and dining.
- Recessed Lighting: Recessed lighting can be used to provide general ambient lighting throughout your kitchen. Ensure that they are strategically placed to avoid creating shadows on your working surfaces.
- Consider Dimmers: Installing dimmer switches allows you to control the intensity of your kitchen lighting, creating a more flexible and customizable space that adapts to your needs and mood.
By considering these tips and exploring the lighting options discussed in our related blog post, you can create a well-lit, stylish kitchen that highlights your newly painted cabinets and enhances your cooking and dining experience.
C. Open Shelving
Open shelving can be a stylish and functional addition to your kitchen, especially when paired with freshly painted cabinets. It can create a sense of openness, make your space appear larger, and provide easy access to frequently used items. Here are some tips to help you integrate open shelves into your kitchen design:
- Choose the Right Material: Select shelving material that complements the color and style of your painted cabinets. Consider factors such as durability, maintenance, and the overall aesthetic you want to achieve. Our related blog post on “Incorporating Open Shelves into a Small Kitchen offers more guidance on choosing the right shelving material for your space.
- Placement: Determine the most suitable locations for your open shelves. They can be installed above your countertops, next to your upper cabinets, or even as a replacement for some upper cabinets. Consider the items you want to display, your workflow, and the available wall space when planning your open shelving layout.
- Style: Choose a style that complements your kitchen design and painted cabinets. Options include floating shelves, bracket-supported shelves, or shelves with decorative supports. The overall style should blend seamlessly with your kitchen decor.
- Organization: To maintain a clean and clutter-free look, carefully curate the items displayed on your open shelves. Group items by color, size, or function, and use decorative containers or baskets to store smaller items. Regularly declutter and reorganize your shelves to keep them looking fresh and appealing.
Incorporating open shelves into your kitchen design can enhance the overall aesthetic and functionality of your space, especially when combined with your newly painted cabinets. Check out our related blog post for more tips and inspiration on how to successfully integrate open shelves into your kitchen.
Related Questions
How long does it take to paint kitchen cabinets?
The time it takes to paint kitchen cabinets can vary significantly depending on factors such as the size of your kitchen, the number of cabinets, and your level of experience. On average, it can take anywhere from a few days to a couple of weeks to complete the entire process, including preparation, painting, and drying time.
Preparation, which involves cleaning, sanding, and priming the cabinets, usually takes about one to two days. Painting the cabinets may take another one to three days, depending on the number of coats required and the drying time between each coat. It’s essential to allow adequate drying time between coats to ensure a smooth, durable finish.
Finally, reassembling the cabinets and hardware after the paint has dried can take an additional day or two. Keep in mind that rushing through the process may compromise the quality of the final result, so it’s crucial to be patient and allocate sufficient time for each step.
How much does it cost to paint kitchen cabinets?
The cost of painting kitchen cabinets can vary based on several factors, such as the size of your kitchen, the type of paint and primer you choose, and whether you decide to do the work yourself or hire a professional. On average, homeowners can expect to spend between $600 and $1,200 for a DIY project or $1,000 to $6,000 if hiring a professional.
For a DIY project, the primary costs will be the paint, primer, and necessary supplies, such as brushes, rollers, sandpaper, and painter’s tape. High-quality paint and primer can range from $30 to $60 per gallon, while tools and supplies may cost an additional $100 to $200.
If you decide to hire a professional, the cost will be higher due to labor expenses. Professional painters typically charge between $50 and $100 per hour, with the overall cost depending on the complexity of the project, the number of cabinets, and the required prep work. Keep in mind that investing in a professional may result in a more polished and durable finish, potentially adding value to your home.
What is the best finish for kitchen cabinets?
The best finish for kitchen cabinets largely depends on your desired look and the level of durability you need. Generally, satin, semi-gloss, and gloss finishes are popular choices for kitchen cabinets due to their ease of cleaning and resistance to wear and tear.
A satin finish offers a soft, velvety appearance and is a great option for a contemporary or classic look. It is fairly durable and easy to clean, but it may not be as resistant to scratches and stains as semi-gloss or gloss finishes. Semi-gloss and gloss finishes provide a higher level of durability and are more resistant to moisture, grease, and fingerprints. These finishes are particularly suitable for high-traffic kitchens and can give a sleek, modern look to your cabinets.
Ultimately, the best finish for your kitchen cabinets will depend on your personal preferences and the specific needs of your space. It’s essential to consider factors such as your kitchen’s overall design, the level of maintenance required, and the desired durability when making your decision.
How often should kitchen cabinets be repainted?
The frequency at which kitchen cabinets should be repainted depends on various factors, including the quality of the paint used, the level of wear and tear they experience, and your personal preferences for updating your kitchen’s appearance.
Typically, a well-painted set of cabinets can last anywhere from 5 to 10 years or even longer before they need to be repainted. If your cabinets experience heavy use or are in a high-traffic area, you may need to repaint them more frequently to keep them looking fresh and well-maintained.
It’s important to keep an eye on the condition of your cabinets and address any signs of chipping, peeling, or fading paint as they occur. Regular cleaning and maintenance can also help extend the life of your cabinet paint job and delay the need for repainting.
Conclusion
In conclusion, revamping your kitchen by painting your cabinets can be a cost-effective and transformative project. By following the top cabinet painting hacks we’ve shared, you’ll be well on your way to a successful and impressive outcome. To recap:
- Use a paint sprayer for a smooth, professional-looking finish.
- Label doors and hardware for easy reassembly.
- Apply painter’s tape to ensure clean edges and prevent paint bleed.
- Add a protective top coat for enhanced durability.
- Incorporate creative details like stencils or patterns to personalize your cabinets.
With the right preparation, tools, and techniques, you can achieve a beautiful and long-lasting result. Don’t hesitate to get started on your cabinet painting project; it’s an excellent opportunity to refresh and update your kitchen. Remember, investing time and effort into the process will pay off, and you’ll be enjoying your newly transformed kitchen in no time!
All About Materials is a participant in the Amazon Services LLC Associates Program, an affiliate advertising program designed to provide a means for sites to earn advertising fees by advertising and linking to Amazon.com. We also participate in other affiliate programs which compensate us for referring traffic.