This post contains affiliate links.
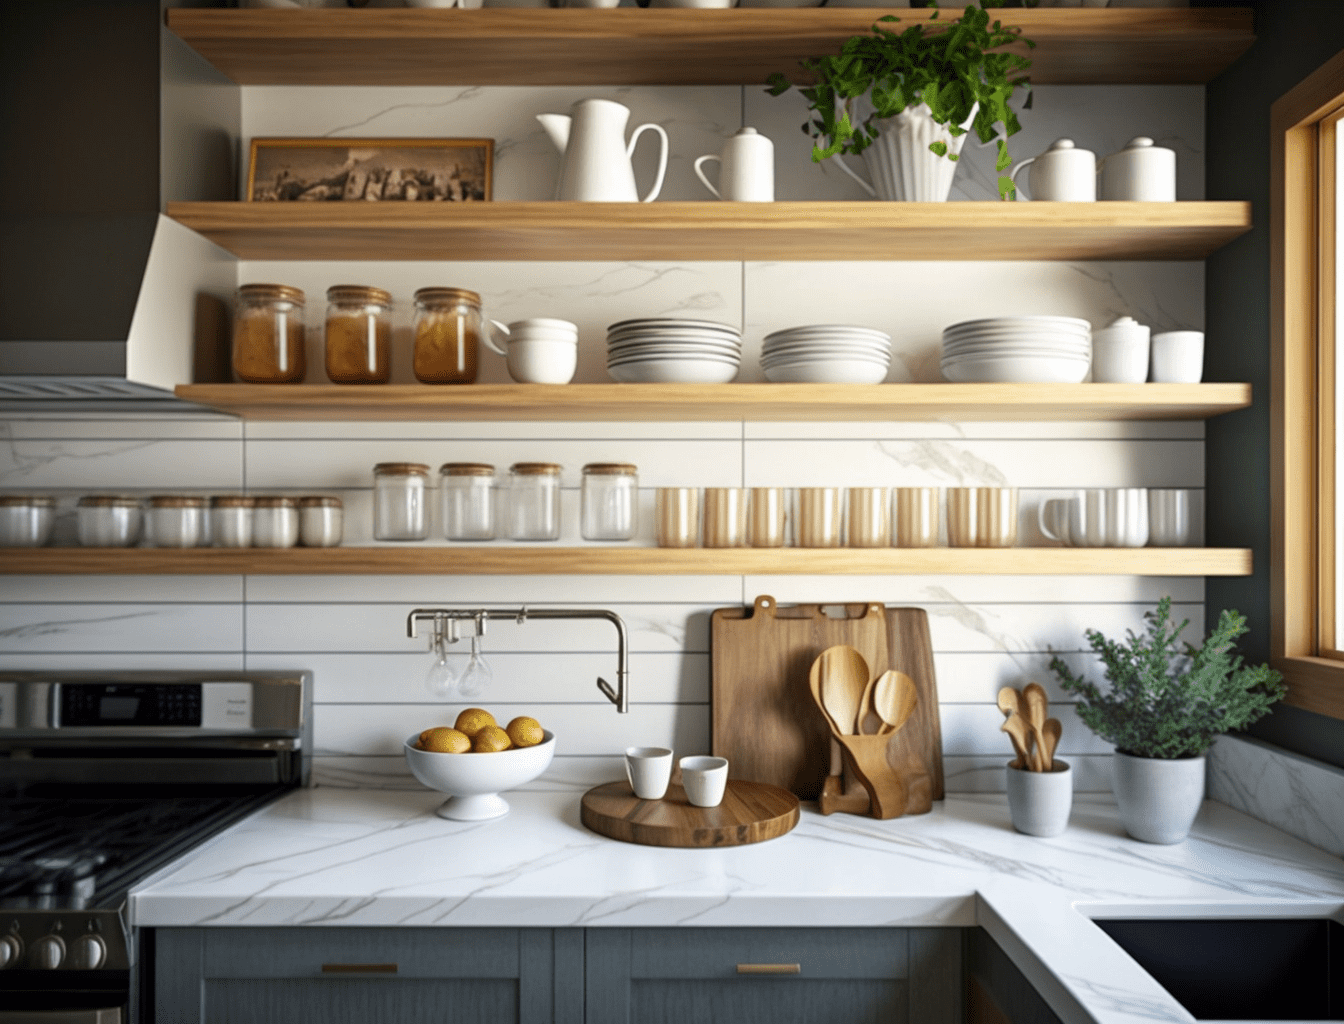
Welcome to our guide on DIY Kitchen Magic: Open Shelving Made Simple & Stylish! Open shelving has become a popular trend in kitchen design, offering an airy and open feel to the space while providing functional storage. Not only do open shelves create a visually appealing aesthetic, but they also make it easy to access and showcase your favorite dishes, cookware, and decorative items.
You might be wondering if installing open shelving is a project you can tackle on your own. The good news is that it is! With the right tools, tips, and a little bit of guidance, you can easily create a beautiful and functional open shelving system in your kitchen. Keep reading to discover our easy-to-follow steps, expert advice, and all the information you need to make your DIY open shelving project a success. Let’s get started!
Planning Your Open Shelving Project
Before diving into the installation process, it’s essential to have a solid plan in place for your open shelving project. In this section, we’ll help you assess your kitchen space, choose the right shelving material, and consider other important factors to ensure your open shelves are both stylish and functional. With careful planning, you’ll be well on your way to creating the perfect open shelving system for your kitchen.
A. Assessing Your Kitchen Space
Before selecting your open shelves, it’s crucial to evaluate the available space in your kitchen. In this part, we’ll discuss how to determine the best wall space and layout for your open shelving, as well as consider factors such as functionality and accessibility. By taking the time to assess your kitchen space, you’ll be able to make informed decisions that will enhance the overall design and functionality of your new open shelving system.
1. Wall Space and Layout
When planning your open shelving system, the first step is to carefully examine the wall space and layout of your kitchen. Consider the following factors:
- Identify potential areas for shelves by looking at empty wall spaces or places where you can replace existing closed cabinets.
- Determine the ideal length and width of the shelves based on available space and your storage needs.
- Keep in mind any obstructions like windows, outlets, or appliances that might affect the placement of your shelves.
Taking these factors into account will help you select the best spot for your open shelving and ensure that it complements your kitchen layout.
2. Functionality and Accessibility
To ensure your open shelves are both functional and accessible, consider the following tips:
- Place shelves within easy reach, ideally between waist and shoulder height, for frequently used items.
- For less frequently used items or decorative pieces, higher shelves can be used.
- Ensure there is enough clearance between the shelves and countertops or appliances to avoid any issues while using the kitchen.
- If you have children, consider their safety and accessibility when planning your shelving layout.
By focusing on functionality and accessibility, you’ll create an open shelving system that works seamlessly with your daily kitchen activities.
3. Small Kitchen Considerations
If you have a small kitchen, don’t worry – open shelves can still be a great addition to your space. For tips on how to add open shelves in limited spaces, check out our article on “Incorporating Open Shelves into a Small Kitchen. This guide will provide you with creative solutions and practical advice on making the most of your available space with open shelving.
B. Choosing the Right Open Shelving Material
Selecting the right material for your open shelves is crucial for both aesthetics and durability. Here are the most common materials to consider and their key characteristics:
1. Wood
Wooden shelves are a popular choice for their warmth and versatility in various kitchen styles. They come in a range of finishes and can be painted or stained to match your decor. Some advantages of wooden shelves include:
- Timeless appeal, suitable for both traditional and modern kitchens
- Wide variety of wood types and finishes to choose from
- Relatively easy to cut and customize to fit your space
2. Metal
Metal shelves offer a sleek and contemporary look, making them a great choice for modern and industrial-style kitchens. Some benefits of metal shelves are:
- Durable and long-lasting material
- Resistant to moisture, making them ideal for humid environments
- Easy to clean and maintain
3. Glass
Glass shelves provide a light and airy feel, making them an excellent choice for smaller kitchens or spaces with limited natural light. Some advantages of glass shelves include:
- Visually expands the space, creating an open and uncluttered look
- Easy to clean and maintain
- Can be combined with various bracket styles for a unique design
For more detailed information on selecting the best material for your open shelves, be sure to read our article on “Choosing the Right Open Shelving Material for Your Design. This comprehensive guide will help you make an informed decision that complements your kitchen’s overall aesthetic and meets your practical needs.
DIY Installation Tips
Now that you’ve planned your open shelving project, it’s time to move on to the installation process. In this section, we’ll provide you with DIY installation tips, covering the necessary tools and materials, a step-by-step guide, and important safety precautions. With these helpful tips in hand, you’ll be well-equipped to tackle your open shelving installation with confidence.
A. Tools and Materials Needed
Before you begin installing your open shelves, gather all the necessary tools and materials to ensure a smooth and efficient process. Here’s a list of items you’ll need for your DIY open shelving project:
- Measuring tape
- Level
- Pencil
- Drill with appropriate bits
- Wall anchors (if not using wall studs)
- Stud finder (optional, but highly recommended)
- Screws and brackets or supports (depending on your shelving system)
- Shelves (wood, metal, or glass, as per your design choice)
One product we recommend for finding studs during the installation process is the Stud Finder Wall Scanner. This handy tool will help you locate studs quickly and accurately, ensuring a secure and stable installation.
With these tools and materials on hand, you’ll be well-prepared to install your open shelves and create a stylish and functional storage solution in your kitchen.
B. Step-By-Step Installation Guide
Follow this step-by-step guide to ensure a successful and secure installation of your open shelves.
1. Measuring and marking
First, measure the space where you plan to install your shelves. Here’s how:
- Use a measuring tape to determine the length and width of the shelves, and mark these measurements on the wall with a pencil.
- Measure the distance between the shelves, keeping in mind the clearance needed for items you plan to store.
- Use a level to ensure that your pencil marks are straight and even.
2. Mounting brackets or supports
Next, mount the brackets or supports for your shelves. Follow these steps:
- If using a stud finder, locate the wall studs and mark their locations.
- Position the brackets or supports on the wall, aligning them with the pencil marks and wall studs (if applicable).
- Use a level to ensure that the brackets or supports are even.
- Drill pilot holes into the wall studs or wall anchors.
- Attach the brackets or supports to the wall using appropriate screws.
3. Attaching shelves
Finally, it’s time to attach the shelves to the brackets or supports:
- Carefully place the shelves onto the brackets or supports, ensuring they are centered and level.
- If your shelving system requires additional fastening, follow the manufacturer’s instructions to secure the shelves in place.
By following these steps, you’ll successfully install your open shelves and create a stylish and functional storage solution in your kitchen.
C. Safety Precautions and Tips
During the installation of your open shelves, it’s important to keep safety in mind. Here are some essential safety precautions and tips to ensure a secure and accident-free process:
- Always wear appropriate protective gear, such as safety glasses and gloves, when working with tools.
- Use a sturdy ladder or step stool to reach higher locations and ensure it’s properly positioned on a flat, stable surface.
- Be cautious when drilling into walls, as there may be hidden electrical wires or plumbing pipes. Use a stud finder with electrical wire detection or consult your home’s blueprints if possible.
- When using a drill, maintain a firm grip and apply steady pressure to avoid slipping and causing injury.
- Never rush the installation process, and take your time to double-check measurements, levelness, and the secure attachment of brackets or supports.
- If you’re unsure about any aspect of the installation, don’t hesitate to consult a professional or seek assistance from an experienced friend or family member.
By following these safety precautions and tips, you’ll minimize the risk of accidents and ensure a secure installation for your open shelves.
Styling Your Open Shelves
Now that your open shelves are installed, it’s time to focus on the fun part – styling them! In this section, we’ll provide you with tips and tricks to create a visually appealing and functional display, ensuring your open shelves not only provide storage but also enhance the overall look of your kitchen. Let’s dive into the world of shelf styling and make your kitchen shine!
A. Balancing Function and Aesthetics
Achieving the perfect balance between function and aesthetics is key to styling your open shelves. Here are some tips to help you create a visually appealing and practical display:
1. Organizing items
When arranging items on your shelves, consider their usage and frequency. Place frequently used items, such as dishes and glassware, within easy reach, while less-used items can be stored on higher shelves. Group similar items together for a cohesive look and improved functionality.
2. Displaying decorative pieces
Incorporate decorative pieces like artwork, small plants, or cookbooks to add visual interest and personality to your shelves. Be mindful of the overall color scheme and theme of your kitchen to ensure that the decorative elements complement your space.
For more advice on how to style open shelves for both practicality and visual appeal, be sure to read our article on “Styling Open Shelves for Storage and Aesthetic Appeal. This guide offers valuable tips and inspiration for creating a beautiful and functional display that truly enhances your kitchen.
B. Color Coordination and Theme
Paying attention to color coordination and theme is essential when styling your open shelves. Here are some ideas to help you create a harmonious and visually appealing display:
1. Stick to a color palette
Choose a color palette that complements your kitchen’s overall design. This could be a monochromatic scheme using various shades of a single color or a combination of complementary colors. Display items that fit within this color scheme for a cohesive and visually pleasing look.
2. Coordinate with kitchen elements
Ensure that the items you display on your open shelves match or complement the colors, materials, and finishes found in other kitchen elements, such as cabinetry, countertops, and appliances. This will create a harmonious and unified look throughout your space.
3. Create a theme
Consider choosing a theme for your open shelves, such as rustic, modern, or farmhouse. This will help guide your choice of items and decorative elements, ensuring a well-curated and visually appealing display. Be consistent with the theme to create a strong visual impact.
By focusing on color coordination and theme, you’ll create a stunning and cohesive display that enhances the overall aesthetic of your kitchen while showcasing your personal style.
C. Adding Lighting for a Dramatic Effect
Incorporating lighting into your open shelving design can elevate the overall look and create a dramatic effect. Here are some tips for adding the perfect lighting to your open shelves:
1. Under-shelf lighting
Consider installing under-shelf lighting to illuminate the items on display and add depth to your shelves. This type of lighting can be achieved with LED strip lights or puck lights, which are both energy-efficient and easy to install.
2. Accent lighting
Adding accent lighting to your open shelves can create visual interest and highlight specific items or decorative elements. This can be achieved by using small, battery-operated LED lights or spotlights placed strategically around your shelves.
3. Ambient lighting
To create a warm and inviting atmosphere, incorporate ambient lighting into your open shelving design. This can be achieved by using a mix of floor lamps, table lamps, and wall sconces placed near your shelves to create a soft, diffused glow.
By adding lighting to your open shelves, you’ll not only enhance their aesthetic appeal but also create a more inviting and comfortable atmosphere in your kitchen. Experiment with different lighting options and styles to find the perfect balance and create a stunning display that complements your overall kitchen design.
Maintaining Your Open Shelves
After successfully installing and styling your open shelves, it’s essential to keep them well-maintained to ensure they continue looking their best. In this section, we’ll share tips on how to clean, organize, and maintain your open shelves, so they remain a beautiful and functional feature in your kitchen for years to come. Let’s explore how to keep your open shelves looking fresh and tidy!
A. Regular Cleaning and Dusting
Keeping your open shelves clean and dust-free is essential to maintain their appearance and ensure the items on display remain in good condition. Here are some tips for regular cleaning and dusting:
1. Weekly dusting
Dust your open shelves at least once a week to prevent the accumulation of dust and dirt. Use a microfiber cloth or a soft-bristled duster to gently remove dust from the shelves and items on display. Make sure to reach all the corners and edges for a thorough cleaning.
2. Deep cleaning
At least once a month, take the time to remove all items from your shelves and give them a thorough cleaning. Wipe down the shelves with a damp cloth and a mild cleaning solution, then dry them with a clean, dry cloth. Ensure the shelves are completely dry before placing items back on them to prevent moisture damage.
3. Cleaning display items
While performing your deep cleaning, take the opportunity to clean the items displayed on your shelves. Wipe down each item with a damp cloth or use appropriate cleaning methods for specific materials, such as glass cleaner for glassware or a wood cleaner for wooden items.
By regularly cleaning and dusting your open shelves, you’ll maintain their appearance, protect your displayed items, and create a healthier environment in your kitchen.
B. Organizing and Decluttering
Keeping your open shelves organized and clutter-free not only maintains their visual appeal but also ensures they remain functional and easy to use. Follow these tips to keep your shelves looking their best:
1. Regular decluttering
Periodically evaluate the items on your open shelves and remove anything that is no longer needed, used, or fits the overall aesthetic. This will free up space for new items and prevent your shelves from becoming overcrowded.
2. Group similar items together
Organize your shelves by grouping similar items, such as cookbooks, dishes, or glassware, together. This will make it easier to find what you need and create a visually pleasing arrangement.
3. Use organizers and containers
Incorporate organizing tools, such as decorative baskets, bins, or containers, to keep smaller items neat and tidy. This will help maintain the organization of your open shelves and prevent items from becoming lost or difficult to find.
4. Maintain a balance
Ensure your shelves remain visually balanced by avoiding overcrowding or empty spaces. Rearrange items as needed to maintain a harmonious and visually pleasing display.
For more helpful tips on maintaining the cleanliness and organization of your open shelves, check out this comprehensive guide – “Organizing Open Shelves: Keeping Them Clean and Tidy“.
By staying on top of organizing and decluttering your open shelves, you’ll maintain their functionality and aesthetic appeal, ensuring they remain a beautiful and practical feature in your kitchen.
C. Inspecting for Wear and Tear
Over time, your open shelves may show signs of wear and tear. Regularly inspecting and addressing any issues will help prolong the life of your shelves and keep them looking their best. Here are some tips for inspecting and maintaining your open shelves:
1. Check for loose or damaged hardware
Periodically inspect the hardware used to mount your shelves, such as brackets or supports, to ensure they are secure and in good condition. Tighten any loose screws and replace any damaged or worn hardware as needed.
2. Examine the shelves for damage
Take the time to carefully inspect the shelves themselves for any signs of damage, such as warping, cracks, or chips. If you notice any issues, address them promptly to prevent further damage or potential accidents.
3. Monitor for signs of moisture
Keep an eye out for signs of moisture or water damage around your open shelves, particularly if they are located near sinks or dishwashers. If you notice any signs of moisture, take steps to address the issue, such as sealing the shelves with a water-resistant finish or fixing any leaks.
4. Touch up paint or finish
Over time, the paint or finish on your open shelves may become worn or chipped. Regularly touch up any areas that need attention to maintain a fresh and polished appearance.
By routinely inspecting your open shelves for wear and tear, you’ll be able to address any issues promptly, ensuring your shelves remain a durable and attractive feature in your kitchen for years to come.
Related Questions
How do I choose the right shelf depth and height?
When choosing the right shelf depth and height for your open kitchen shelves, it’s essential to consider both functionality and aesthetics. The ideal depth and height will depend on the items you plan to store on the shelves and the overall design of your kitchen.
For shelf depth, consider the largest items you plan to display or store on the shelves. As a general rule, a depth of 10 to 12 inches works well for most kitchen items, such as dishes, cookware, and small appliances. However, if you have larger items or want a more dramatic look, you may opt for deeper shelves.
For shelf height, take into account the heights of your family members and any accessibility requirements. Ensure that frequently used items are within easy reach, while decorative or less-used items can be placed on higher shelves. Keep in mind that shelves placed too high or too low may be difficult to access and may detract from the overall aesthetic of your kitchen.
Can I use open shelving in a humid or damp environment?
While it is possible to use open shelving in a humid or damp environment, extra care and consideration must be taken to ensure the shelves and their contents are protected from moisture-related damage. Open shelves in such environments may require more frequent maintenance and cleaning to prevent mold and mildew growth.
Selecting the right materials for your shelves is crucial in damp environments. Choose moisture-resistant materials, such as stainless steel, glass, or specially treated wood, to prevent warping, rotting, or rusting. Additionally, applying a water-resistant sealant or finish to your shelves can provide an extra layer of protection against moisture damage.
To further minimize moisture-related issues, ensure proper ventilation in the area where the open shelves are installed. This can help regulate humidity levels and reduce the risk of damage to both the shelves and their contents.
How do I make my open shelves child-safe?
Making open shelves child-safe involves a combination of proper placement, organization, and securing any potentially hazardous items. By taking these precautions, you can create a safe environment for your children while still enjoying the benefits of open shelving in your kitchen.
First, consider the placement of your shelves. Install them at a height that is difficult for young children to reach or access. Reserve lower shelves for safer, child-friendly items such as lightweight plastic containers, and store breakable or potentially dangerous items higher up.
Additionally, secure any hazardous items, such as sharp utensils, heavy appliances, or glassware, by using shelf dividers, storage bins, or other organizational tools that can prevent items from falling or being easily accessed by children. Regularly inspect the shelves for any potential hazards and adjust your organization as needed to maintain a child-safe environment.
Conclusion
In conclusion, installing open shelving in your kitchen can significantly enhance both the functionality and aesthetics of your space. By taking the DIY route, you can save money and create a personalized design that matches your unique preferences and needs. We’ve walked you through the essential steps, from planning and choosing the right materials to installation and styling tips, as well as maintaining your open shelves for long-lasting enjoyment.
With the right tools, materials, and guidance, you can transform your kitchen into a stylish, organized space that showcases your personality and taste. Don’t be afraid to take on this DIY project and make your kitchen your own. The benefits of open shelving are well worth the effort, and you’ll be proud of your handiwork for years to come. So, gather your tools, pick your materials, and get ready to create your dream kitchen with open shelving.
All About Materials is a participant in the Amazon Services LLC Associates Program, an affiliate advertising program designed to provide a means for sites to earn advertising fees by advertising and linking to Amazon.com. We also participate in other affiliate programs which compensate us for referring traffic.