This post contains affiliate links.
Let’s face it, your kitchen cabinets say a lot about your kitchen. They’re not only a functional part of your space, but they also contribute significantly to your kitchen’s overall aesthetic. When they’re outdated or worn out, they can make your kitchen feel the same. But there’s good news! You can give your kitchen a whole new look by simply updating your cabinets.
However, we know that kitchen remodeling can be quite the challenge, especially when you’re working with a tight budget. The costs can quickly add up, leaving many of us feeling overwhelmed and unsure of where to start. But don’t worry, we’ve got your back! In this article, we’ll share with you five cheap and easy hacks to breathe new life into your kitchen cabinets. Trust us, by the end of this, you’ll be brimming with inspiration and ready to tackle your kitchen cabinet revamp head-on! So grab a cup of coffee, and let’s get started.
Hack #1: Paint Your Cabinets
Let’s dive right into our first hack – painting your cabinets. Yes, you read that right! A fresh coat of paint can work wonders and completely transform your kitchen cabinets. This is a budget-friendly option that allows you to inject a new color scheme and add personality to your space. Let’s break down the steps on how to do this effectively.
Choosing the Right Paint
Picking the right paint for your kitchen cabinets isn’t just about color selection, it’s also about understanding the different types of paints and their characteristics. Let’s take a closer look.
Types of Paint
- Oil-Based Paint: Known for its robust and smooth finish, oil-based paint is quite durable. It’s a great choice for kitchen cabinets, as it resists staining and wear. However, it takes longer to dry and has a stronger odor compared to other types.
- Latex (Water-Based) Paint: This is a popular choice due to its quick drying time and minimal odor. It’s also easier to clean up, just requiring water and soap. However, it may not be as durable as oil-based paint.
- Acrylic-Alkyd Paint: A hybrid of oil and water-based paint, this type offers the best of both worlds. It’s as easy to clean as latex paint, yet it provides the hard, durable finish of oil-based paint.
Finish Options
- Glossy: This finish reflects a lot of light, making the cabinets stand out. It’s easy to clean but highlights imperfections.
- Semi-Gloss: Not as shiny as glossy, but it’s easier to clean than satin or matte finishes.
- Satin: Offers a soft luster that’s easy on the eyes. It’s harder to clean than gloss or semi-gloss.
- Matte: This finish provides a non-reflective appearance. It’s stylish but not as easy to clean.
Choosing a Color
Selecting the right color is subjective and depends on your personal style and the overall design of your kitchen. However, here are a few pointers:
- Light colors can make a small kitchen look bigger.
- Dark colors add sophistication but can make the room seem smaller.
- Neutral colors like white, gray, and beige remain popular choices because of their versatility.
Remember, it’s a good idea to buy a small amount of paint and test it on a hidden area of your cabinet before fully committing to the color.
Step-By-Step Guide to Painting Cabinets
Transforming your kitchen cabinets with paint doesn’t have to be a daunting task. Below, we’ve broken down the process into a simple, step-by-step guide.
Materials You’ll Need
Before you get started, make sure you have the following materials on hand:
- Screwdriver
- Sandpaper (medium and fine-grit)
- Tack cloth or damp rag
- Primer
- Paint
- Paintbrushes and rollers
- Painter’s tape
- Drop cloth or newspaper
Steps to Paint Your Cabinets
- Remove the Cabinet Doors and Drawers: Start by using a screwdriver to remove the doors, drawers, and hardware from your cabinets. This makes them easier to paint and provides a smoother finish.
- Clean the Surfaces: Kitchen cabinets can accumulate grease and grime over time. Use a mild detergent mixed with warm water to thoroughly clean all surfaces. Rinse and allow them to dry completely.
- Sand the Surfaces: Sanding helps the paint adhere better. Start with medium-grit sandpaper to remove the old finish, then switch to fine-grit sandpaper for a smoother surface. Wipe off the dust with a tack cloth or damp rag.
- Apply Primer: Primer helps to hide the original color and provides a good base for the paint. Apply a coat of primer to all surfaces, and allow it to dry completely.
- Apply Paint: Now it’s time for the main event. Paint the cabinets, starting with the edges and openings, then move to the faces. Use thin coats for the best finish, and remember to allow each coat to dry before applying the next one.
- Reassemble: Once the final coat of paint is dry, reattach the hardware and reassemble your cabinets.
Voila! You’ve successfully transformed your kitchen cabinets with paint. For more detailed instructions and visuals, check out this comprehensive guide from This Old House.
Still unsure about what color to paint your cabinets? Don’t worry, we’ve got you covered! We’ve created a detailed guide discussing the best paint colors to update kitchen cabinets. Whether you’re a fan of bright and bold hues or prefer a more minimalist, neutral look, we’ve got something for everyone. Check out our blog post “What are the best paint colors to update kitchen cabinets?”, and find the color that best suits your style and kitchen!
Hack #2: Apply Contact Paper
Moving on to our next hack, let’s explore the magic of contact paper. It’s an innovative, adhesive material that allows you to change the look of your cabinets without the mess of paint or the cost of replacing them. It’s easy to apply, comes in a variety of designs, and best of all, it’s removable. Let’s delve into the process of how you can use contact paper to revamp your kitchen cabinets.
Overview of Contact Paper
Contact paper is a versatile, adhesive material that can quickly transform the look of your cabinets. But what exactly is it, and why should you consider it for your kitchen revamp? Let’s find out.
What is Contact Paper?
Contact paper, also known as adhesive or vinyl paper, is essentially a type of wallpaper that sticks on contact. It features a decorative surface on one side and a highly adhesive material on the other. It’s typically used for lining shelves or decorating surfaces, and it’s a fantastic, budget-friendly option for updating your kitchen cabinets.
Why Use Contact Paper?
Here are a few reasons why contact paper might be the right choice for your kitchen cabinet makeover:
- Variety: Contact paper comes in a wide range of colors, patterns, and textures. This means you can mimic the look of more expensive materials, like marble or wood, at a fraction of the cost.
- Easy to Apply: Unlike painting or replacing your cabinets, applying contact paper is a relatively simple process that doesn’t require any special skills or tools.
- Removable: If you change your mind or want to try a new design, you can easily remove contact paper without damaging the surface underneath.
- Durable: Contact paper is water-resistant and easy to clean, making it a practical choice for kitchen cabinets.
- Cost-Effective: Compared to other kitchen cabinet update methods, using contact paper is a very budget-friendly option.
Ready to give contact paper a try? Let’s walk through the process of how to apply it to your kitchen cabinets.
Pros and Cons of Using Contact Paper
Like any other material, contact paper has its advantages and disadvantages. Before deciding to use it for your kitchen cabinet update, let’s weigh the pros and cons.
Pros
- Affordability: As mentioned earlier, contact paper is a budget-friendly choice. It costs significantly less than new cabinets or professional paint jobs.
- Variety of Designs: With countless colors, patterns, and textures available, you’re sure to find a design that matches your style and kitchen decor.
- Easy Installation: Contact paper is easy to apply, and you don’t need any professional help. All you need is a pair of scissors, a ruler, and a smoothing tool.
- Removability: If you’re a renter or simply like to change your decor frequently, you’ll appreciate that contact paper can be easily removed without leaving residue or damaging the surface.
- Easy Maintenance: Contact paper is water-resistant and easy to clean, which is a plus in a kitchen environment.
Cons
- Durability: While contact paper is reasonably durable, it might not hold up as well as paint or new cabinet doors over time, particularly in high-traffic kitchens.
- Surface Imperfections: Contact paper will adhere to the surface of your cabinets as is. That means any imperfections, like scratches or dents, will still be visible.
- Application Process: While it’s easy to apply, getting a smooth, bubble-free finish can be challenging. It requires patience and precision.
Despite some drawbacks, contact paper can still be an excellent solution for budget-friendly kitchen cabinet updates, particularly for DIY enthusiasts or those looking for a quick, non-permanent change.
Step-By-Step Guide to Applying Contact Paper
Applying contact paper to your kitchen cabinets can be a fun and rewarding DIY project. Let’s break down the process into easy-to-follow steps.
Materials You’ll Need
Before you start, gather the following materials:
- Contact paper of your choice
- Measuring tape
- Scissors
- Utility knife
- Smoothing tool (or credit card)
- Clean cloth
Steps to Apply Contact Paper
- Clean the Cabinets: Clean your cabinets thoroughly. Use a degreaser if necessary to remove any stubborn grime or grease. Make sure the surface is dry before proceeding.
- Measure and Cut: Measure the cabinet surfaces and cut out the pieces of contact paper accordingly. It’s a good idea to add a few extra inches to your measurements to account for any mistakes.
- Peel and Stick: Peel off the backing of the contact paper a little at a time and stick it onto the surface, smoothing it out as you go to avoid any air bubbles. Using a smoothing tool or a credit card can help with this.
- Trim the Edges: Once the contact paper is applied, use a utility knife to trim off any excess along the edges. Be careful not to scratch the cabinet surface.
- Smooth Out Bubbles: If you notice any air bubbles, use your smoothing tool to push them towards the nearest edge.
- Repeat: Repeat the process with each cabinet or drawer front until you’ve covered all the surfaces you want to update.
And that’s it! You’ve successfully applied contact paper to your kitchen cabinets, giving them a new look without breaking the bank. For a more visual guide, you can check out the video tutorial below from Genesis Adams.
If you’re wondering whether you can use contact paper on laminate cabinets, we’ve got a blog post just for that. We explore how contact paper interacts with different materials, including laminate, and provide tips for the best results. To learn more, visit our blog post “Can contact paper be used on laminate cabinets?” and get all the information you need. Don’t let anything hold you back from achieving your dream kitchen look!
Hack #3: Replace Cabinet Hardware
Our next budget-friendly kitchen cabinet update revolves around hardware. You’ll be surprised at how much of a difference swapping out your old cabinet handles and knobs can make! It’s like jewelry for your kitchen – the right pieces can really make it shine. This simple project requires minimal time and effort but delivers maximum impact. Let’s delve into the details.
Importance of Hardware in Cabinet Aesthetics
Cabinet hardware might seem like a small detail, but it plays a vital role in your kitchen’s overall look and feel. Let’s explore why it matters so much.
Style Statement
Firstly, cabinet hardware is more than just functional pieces; they’re style statements. The type, color, and design of the handles or knobs you choose can dramatically alter the vibe of your kitchen. For instance, sleek stainless steel bar handles can give a modern, minimalist feel, while ornate brass knobs can lean towards a more traditional or vintage aesthetic.
Accentuating Cabinets
Secondly, hardware serves to accentuate your cabinets. They draw the eye and can either complement or contrast with your cabinet’s color and style. For instance, dark hardware on light-colored cabinets can create a striking contrast, and vice versa.
Cohesion and Harmony
Finally, the right hardware can bring cohesion to your kitchen design. By matching your cabinet hardware with other elements in the kitchen, like faucets or light fixtures, you create a sense of harmony and thoughtful design.
In conclusion, while they might be small, handles and knobs are significant players in your kitchen’s aesthetic game. Therefore, replacing old or outdated cabinet hardware can provide a notable visual upgrade without requiring a significant budget.
Choosing the Right Hardware Style
When it comes to choosing new hardware for your kitchen cabinets, there are a few key factors to consider. These include your kitchen’s overall design theme, the look you want to achieve, and the practicality of the hardware.
Matching Your Design Theme
Firstly, your new cabinet hardware should match your kitchen’s overall design theme. For instance, if you have a rustic kitchen, you might opt for hardware with a distressed or antique finish. For modern or minimalist kitchens, sleek and simple designs in matte black, chrome, or stainless steel can work well.
Creating a Look
The hardware you choose can also create a specific look or mood in your kitchen. Bold, oversized knobs can make a statement and become a focal point. On the other hand, slim, discrete handles can blend into the cabinet, letting other design elements take center stage.
Practical Considerations
Practicality is another crucial factor. You’ll be using these handles or knobs daily, so they should be comfortable to grip and durable. Consider the size and shape of the hardware, especially if you have large or small hands, children, or individuals with mobility issues in your household.
Experiment with Samples
Finally, don’t be afraid to experiment. Many home improvement stores offer sample hardware pieces that you can take home and try out on your cabinets. This can give you a real-world feel for how the hardware will look and function in your space.
In conclusion, selecting the right cabinet hardware involves balancing aesthetics and functionality. So take your time, explore your options, and choose pieces that will elevate your kitchen’s style and make daily use a pleasure.
How to Replace Cabinet Hardware
Replacing your kitchen cabinet hardware is a straightforward task that you can definitely do yourself. Here’s a step-by-step guide on how to go about it.
Gather Your Tools
First, gather the necessary tools. You’ll need:
- A screwdriver or drill
- New hardware
- A measuring tape
- Possibly a pencil and masking tape
Remove the Old Hardware
Next, use your screwdriver or drill to remove the old hardware from your cabinets. Be careful not to scratch or damage your cabinets during this process.
Measure for New Hardware
If your new hardware doesn’t align with the existing holes in your cabinets, you’ll need to measure and mark where the new holes should be. Use your measuring tape to determine the right position, mark it with a pencil, and place masking tape over the area to avoid splintering when you drill.
Install the New Hardware
Now, you’re ready to install the new hardware. If needed, drill new holes first, then remove the masking tape. Align the screws of the new hardware with the holes, and screw them in. Ensure they’re secure, but be careful not to overtighten and risk damaging your cabinets.
Repeat and Enjoy
Repeat the process until all the hardware has been replaced. Once you’ve installed all your new cabinet handles or knobs, step back and enjoy the fresh, updated look of your kitchen cabinets!
This simple yet effective hack can make a significant difference in your kitchen’s overall aesthetic. So go ahead and give it a try!
Now that you’re ready to revamp your kitchen with new cabinet hardware, here are a few products available on Amazon that you might find interesting:
- Franklin Brass Kitchen Cabinet Handles – These sleek and modern handles come in a variety of finishes to match any kitchen style.
- KOOFIZO Solid Square Bar Cabinet Handle – For a bold, contemporary look, these solid square bar handles might be just what you’re looking for.
- DecoBasics Kitchen Cabinet Hinges – If you’re looking to change your cabinet’s hinges along with the handles, these are a great option.
- Rok Hardware Knob Handle Pull Drill Mounting Template For Cabinet Doors And Drawers – This handy tool will make sure you get the right placement for your new hardware every time.
Remember, these are just suggestions. Be sure to browse through Amazon’s extensive range to find the perfect fit for your style and budget. Updating your kitchen cabinets doesn’t have to break the bank, and these budget-friendly options prove just that!
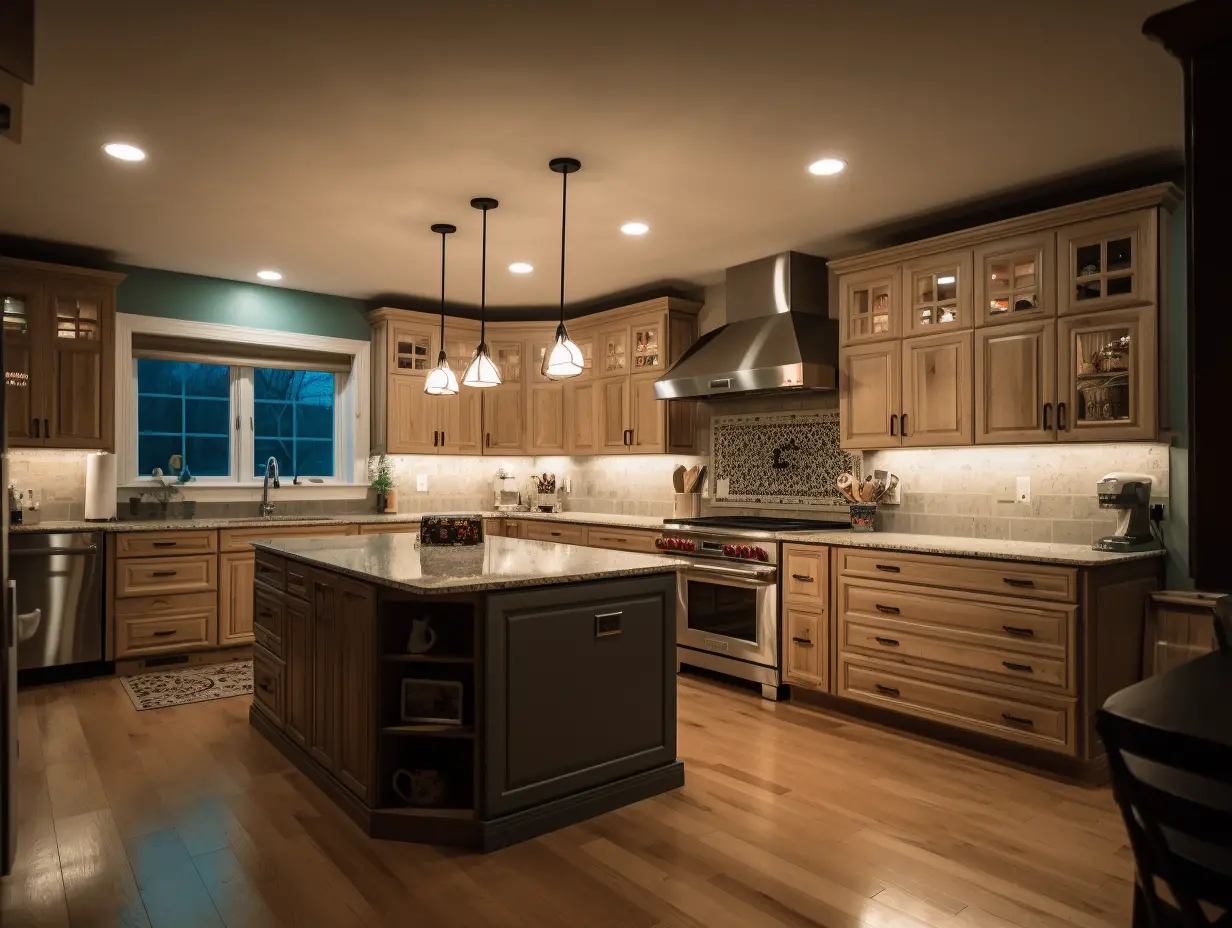
Hack #4: Install Under-Cabinet Lighting
Ready for your next budget-friendly kitchen cabinet update? Let’s consider under-cabinet lighting. This often-overlooked feature can significantly enhance the functionality and aesthetics of your kitchen. In this section, we’ll explore the benefits of under-cabinet lighting and guide you on how to install it effectively.
Benefits of Under-Cabinet Lighting
Under-cabinet lighting brings a host of advantages to your kitchen. Let’s explore some of the reasons why you should consider this upgrade.
Enhanced Visibility
First and foremost, under-cabinet lighting improves visibility on your countertops. It’s perfect for tasks that require a keen eye, like chopping vegetables or reading recipes. The direct light source reduces shadows cast by overhead lighting, providing an excellent task light for meal preparation.
Improved Aesthetics
Lighting isn’t only functional; it’s a crucial element of design. Under-cabinet lights can add a warm, inviting ambiance to your kitchen. It can accentuate your backsplash, make your countertop shine, and give your space a high-end, polished look.
Energy Efficiency
Many under-cabinet lighting options, like LED strips, are energy-efficient. They use less electricity than traditional bulbs, saving you money in the long run. Plus, LEDs have a longer lifespan, reducing the frequency of replacements.
Increased Home Value
Finally, under-cabinet lighting can increase the value of your home. It’s a sought-after feature that potential homebuyers appreciate. This small investment can pay off in the long run if you plan to sell your home.
In essence, under-cabinet lighting offers a blend of practicality and style, making it a smart and budget-friendly addition to your kitchen cabinet update plan.
DIY Installation Guide
Installing under-cabinet lighting may sound complex, but with a bit of patience, it’s a task you can handle on your own. Let’s walk through a step-by-step guide to help you illuminate your kitchen cabinets with ease.
1. Choose Your Lights
Start by choosing the type of under-cabinet light that suits your needs and style. LED strip lights or puck lights are popular choices due to their energy efficiency, long lifespan, and ease of installation.
2. Measure Your Space
Next, measure the length under your cabinets where you plan to install the lights. This will determine how many lights or how long a strip you need.
3. Purchase Necessary Materials
Once you have your measurements, purchase your lighting kit. Most kits include all the necessary components for installation, including the lights, power source, and mounting hardware.
4. Prepare the Area
Before installation, clean the area under the cabinets and let it dry. This ensures that the adhesive (if you’re using adhesive-backed strip lights) sticks properly.
5. Install the Lights
Follow the manufacturer’s instructions to install your lights. This often involves attaching the lights to the underside of the cabinets using either the adhesive back or screws, then connecting the lights to a power source.
6. Test Your Lights
After everything is installed, test your lights to make sure they’re working properly. If not, check all connections and try again.
While this guide provides a general overview, always refer to the specific instructions provided with your lighting kit. It’s also important to remember that safety comes first. If you’re unsure about any step, it’s always a good idea to hire a professional electrician.
In the next section, we’ll recommend some lighting options you can find on Amazon to kickstart your under-cabinet lighting project.
For more detailed advice on kitchen lighting, be sure to check out our blog post on “What are the key components of a successful kitchen lighting design plan?”. It provides a comprehensive guide that can help you create a balanced and functional lighting plan for your kitchen. It’s an excellent resource to expand your understanding of how to use lighting effectively in your kitchen, beyond just under-cabinet lighting. Don’t miss out on it!
Hack #5: Add Open Shelving
Our final hack takes a leap into the world of modern kitchen design trends — open shelving. It’s a unique way to not only update your kitchen cabinets but also to showcase your favorite dishes, glassware, or even a collection of cookbooks. Open shelving isn’t just about style; it can also add functionality to your kitchen, making items easier to access. Let’s explore how you can incorporate this trend into your kitchen without breaking the bank.
Advantages of Open Shelving
Open shelving has become a staple in modern kitchen design for various reasons. Let’s take a look at some of the advantages it brings to your kitchen.
Aesthetics and Personalization
Open shelves bring a fresh, airy feel to your kitchen and offer a platform to showcase your personality. You can display your favorite dishes, vintage finds, or even a collection of cookbooks. It’s an easy way to add color and texture to your kitchen and make it feel more lived-in and personalized.
Functionality and Accessibility
From a functional standpoint, open shelves make it easier to access dishes, glasses, and other kitchen essentials. They’re especially useful in smaller kitchens where cabinet space may be limited.
Versatility
Open shelving can be adapted to any kitchen style, from modern to rustic. The type of material you choose for your shelves can also contribute to the overall aesthetic. For instance, wooden shelves can bring a warm, rustic vibe, while metal or glass shelves can suit a more modern or industrial kitchen design.
Cost-Effective
Compared to traditional cabinets, open shelves can be a more budget-friendly option. Depending on the materials used, they can be significantly cheaper and easier to install. Plus, you can do the installation yourself, saving on labor costs.
Remember, open shelving doesn’t mean you have to get rid of all your cabinets. A balanced mix of both can provide the best of both worlds.
How to Convert Cabinets to Open Shelves
If you’re ready to jump into the open shelving trend, you might be wondering how to start. One cost-effective way is to convert your existing upper cabinets into open shelves. This DIY project is fairly straightforward and can be completed over a weekend. Let’s go through the process.
1. Planning
Before you start, it’s essential to plan which cabinets you want to convert. Generally, upper cabinets are the best candidates for this project. Consider the items you’ll be storing on these shelves. They should be items you use regularly and wouldn’t mind having on display.
2. Removing Cabinet Doors
Start by removing the cabinet doors. You’ll need a screwdriver to unscrew the hinges from the cabinet frame. Make sure to keep all the screws and hinges in a safe place in case you want to revert back to closed cabinets in the future.
3. Preparing the Cabinets
Once the doors are removed, you’ll likely need to do some preparation work on the cabinets. This could include filling holes left by the hinges with wood filler, sanding the surface to create a smooth finish, and cleaning the cabinets to remove any dust or grime.
4. Painting the Cabinets
Painting the interior of your cabinets can give your new open shelves a fresh look. Choose a color that complements your kitchen decor. Make sure to apply a primer before the paint to ensure an even and long-lasting finish.
5. Adding Shelf Liners
Adding shelf liners is an optional step that can help protect your shelves and make cleaning easier. There are various styles and patterns available, so you can choose one that fits your kitchen design.
6. Arranging Your Items
The final step is the fun part — arranging your items on your new open shelves. Remember to place the items you use most frequently on the lower shelves for easy access.
Before you start this project, keep in mind that open shelves will require more frequent cleaning than closed cabinets, as items will be exposed to dust and kitchen grease. But with the added style and functionality, many homeowners find it’s worth the extra maintenance.
If you’re considering different materials for your open shelving project, check out this detailed guide on “Choosing the Right Open Shelving Material for Your Design. It provides valuable insights into various materials and helps you understand which one may best suit your needs and style preferences.
For those looking for high-quality shelf liners or decorative items to display on your new open shelves, Amazon has a wide variety of options:
- Duck Brand Select Grip EasyLiner Shelf Liner: This non-adhesive shelf liner is perfect for protecting your new open shelves. It’s easy to install and remove, plus it’s machine washable.
- Greenco Decorative 4 Cube Intersecting Wall Mounted Floating Shelves: If you want to add some style to your kitchen, these floating shelves can be an interesting addition. They’re perfect for displaying decorative items or small kitchen gadgets.
Remember, the items you choose to display on your shelves can greatly impact the overall look of your kitchen, so choose wisely!
Conclusion
In conclusion, updating your kitchen cabinets doesn’t have to break the bank. We’ve explored five cheap hacks that can breathe new life into your space:
- Paint Your Cabinets: A fresh coat of paint can work wonders in transforming the look and feel of your kitchen.
- Apply Contact Paper: This versatile material allows for a quick and easy update to your cabinet surfaces.
- Replace Cabinet Hardware: Changing out knobs and pulls can create a significant impact on your cabinets’ appearance.
- Install Under-Cabinet Lighting: Enhance your kitchen’s ambiance and functionality with strategically placed lighting.
- Add Open Shelving: Convert your cabinets into open shelves for a more spacious and modern look.
With these cost-effective solutions, you’re now equipped to start your kitchen cabinet revamp. Remember, even small changes can make a big difference in the overall appearance of your kitchen. So, don’t be afraid to experiment and find the perfect combination of updates that suits your style and budget. Happy remodeling!
Related Questions
Can I update my kitchen cabinets with wallpaper?
Absolutely, you can indeed update your kitchen cabinets with wallpaper! Wallpaper offers a wide range of patterns, colors, and textures that can transform your cabinets and give your kitchen a fresh, new look. Plus, it’s an affordable and creative way to introduce unique design elements into your space.
However, it’s crucial to choose the right type of wallpaper and follow proper application procedures to ensure a smooth and durable finish. Wallpapering kitchen cabinets may require a bit more preparation compared to painting or applying contact paper, but the striking results can be well worth it.
For a more detailed guide on how to successfully wallpaper your kitchen cabinets, check out our dedicated blog post, “Can I update my kitchen cabinets with wallpaper?“. You’ll find step-by-step instructions, tips, and ideas to help you with this exciting project.
Is contact paper removable?
Yes, contact paper is removable. It’s one of the many reasons why it’s such a popular choice for updating surfaces like kitchen cabinets. When you’re ready for a change, or if you’re moving out of a rental property, you can simply peel it off.
However, the ease of removal can depend on a few factors such as the quality of the contact paper, the surface it was applied to, and how long it’s been in place. While usually it comes off cleanly, there might be instances where it leaves a bit of adhesive residue which can be cleaned off.
To get more insights on how to properly remove contact paper without damaging your cabinets and how to deal with any residue, head over to our blog post, “Is contact paper removable?“. It provides a comprehensive guide that can assist you in the process.
All About Materials is a participant in the Amazon Services LLC Associates Program, an affiliate advertising program designed to provide a means for sites to earn advertising fees by advertising and linking to Amazon.com. We also participate in other affiliate programs which compensate us for referring traffic.